Programming Quick start for using WinAsm Studio and developing applications for Windows & DOS
Author: Antonis Kyprianou
Setting up WinAsm Studio is rather simple, but there are a few steps involved before you can start coding.
-
Obviously, you need to have WinAsm Studio. Download the latest Full-Package build available in the Downloads/WinAsm Studio section of this site.
Unzip WinAsmxxxx.zip and place the WinAsm directory somewhere on your drive, preferably at the root of your C: drive (i.e. C:\WinAsm).
-
Since the WinAsm Studio download does not include Microsoft Macro Asse mbler ( MASM), you will need to obtain the MASM package via other means.
The recommended method is downloading the MASM32 package from Hutch's Masm32 page.
MASM32 is well suited for Win32 development. The package includes the binaries, includes and libraries which WinAsm Studio can use. You must install MASM32 at the root of one of your partitions (i.e. C:\Masm32, D:\Masm32, etc.).
-
While not required, WinAsm Studio also integrates with the free Microsoft Win32 Programmer's Reference help file allowing quick reference to various Win32 API calls via the F1 key. You can download this help file from Microsoft Win32 Programmer's Reference at the Downloads Area of this site.
-
Now that WinAsm Studio and MASM32 are installed, it's time to run WinAsm Studio and customize it's path settings.
-
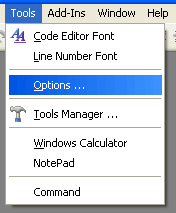
From the Tools menu, choose "Options...".
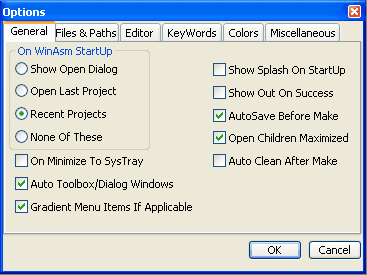
The "General" default tab is displayed. For now, select the "Files & Paths" tab.
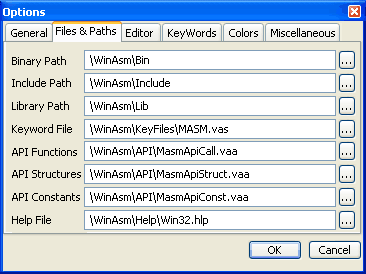
By default, the "Files & Paths" tab will look something like the image below. The paths to the various directories and files will probably be different on your system, so click the  button for each directory and file whose path needs changing and select the appropriate path in the resulting dialog box. button for each directory and file whose path needs changing and select the appropriate path in the resulting dialog box.
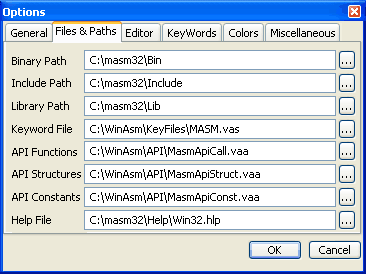
After doing so, the "Files & Paths" tab might look like the following image. Click the OK button to save these changes to the WinAsm.ini file. Now you can start a new project and start coding.
| 


